
Tuesday, July 29, 2014
The Next Two Projects - Simplicity 2758
Monday, July 28, 2014
Simplicity 2758 - The Denim Skirt is Finished.

I'm pleased with the results of Simplicity 2758. The uneven hemline is because of my uneven hip line. I compensate for it two ways. I adjusted this pattern at the waist and at the hemline, making about half the needed adjustment in each place. This way I don't get too much distortion in either place. The raised hip is one reason I sew. I cannot get a ready-to-wear skirt to hang straight with reworking just the hemline. I need to adjust the waist too, at that point, I might as well sew the garment.

Here's the modeled garment. Even with the belt, I'm please with the look.
Garment finish: A
Fit: A
Choice of Materials: A+
Friday, July 25, 2014
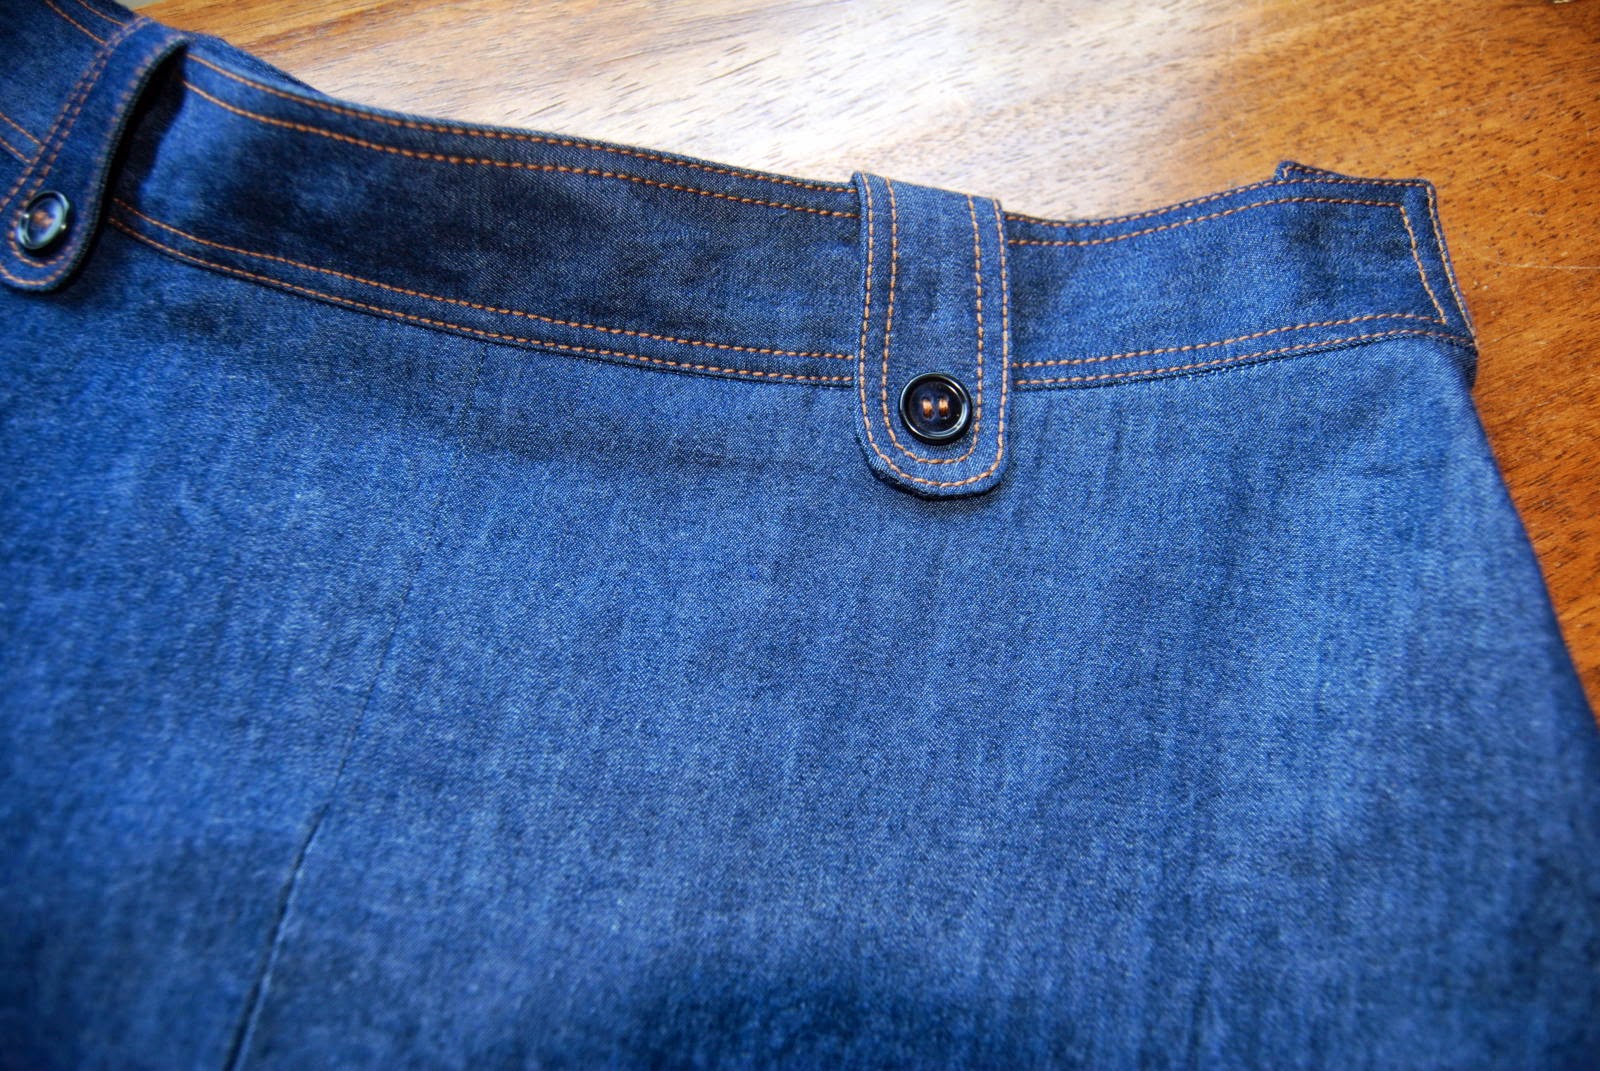
Simplicity 2758 - Waistband Details


Thursday, July 24, 2014
Simplicity 2758 - Preparing the Details


Thursday, July 17, 2014
Simplicity 2758 - Planning and Drafting

The next project is a denim skirt. I've chosen a Simplicity pattern, number 2758. It's from their "Threads - Step by Step" range. These patterns tend to be well drafted and this one has a blouse with C and D cup options. That's right up my street! I could use a nice blouse for next fall, but for now, back to the skirt.
The skirt is very simple. It's an A-line silhouette with a large inverted pleat at the center front seam. There is some waist line detail on this skirt. It has some optional belt loops which are really cute. I've decided to include those in my project since the skirt is smooth with no fullness at the waist seam. I've chosen a light weight cotton denim for this project. The first job is adjusting the pattern for my waist line without adding extra to the hip. After that, it should be a straight forward project.
Wednesday, July 16, 2014
Vogue 7375 - 1952 In Today's Wardrobe

Next project is a denim skirt. It's a more of work horse in my wardrobe than a pair of jeans and I need to replace it often. I've chosen a simple A-line skirt pattern and the denim came from my last fabric haul.
Tuesday, July 15, 2014
Vogue 7375 - 1952 Final Evaluation
Oh dear, life's major and minor events have taken me away from my sewing room and this blog for far too long. I have finished my first project from VoNBBS. This is my take on Vogue 7375 - The Full Gathered Skirt.
 Here's the finished skirt on my dressmaking form. I'm happy with the finish of the garment. There are no major mistakes, even after I had to adjust the waistline measurement and loose my couture buttonhole. The plaid matches very well. You can see the black stripe at the waist is about half waistband and half gathered skirt. The hem line is straight and ends with about 3/4 of a black stripe.
I am concerned with the gathered waist and my thickening middle. I've said this before on the blog, I have three major fitting problems. They are a larger than average bust line, a thick waist and a short waist length. Only one I can do anything about physically, the thick waist is a constant battle that is proving more and more difficult as the years go on. The other flaws are just my body type. Normally, I wouldn't choose this type of pattern because it draws too much attention to my mid-section. Contruction grade: A-

And I was correct! Not the best look for me, but it's not a complete failure. (Yes, worse sewing disasters have been made in the recent past.) The light soft gingham saves the look by not be too puffy at the waist. I would wear this with an untucked blouse or sweater rather than the belt. Style and Wear Ability: C-
 Here it is again with a black twinset sweater. I apologize for the photo. The quality is simply awful. It has a huge flash shadow which adds so much more width to the whole effect. The skirt style is much better with a sweater or over blouse, however the black twin set and pearls is a far too literal interpretation of the 1950's and the effect becomes costume. Style and Wear Ability: up one-half to a C.
I'm going to have to think seriously about the styles in VoNBBS and pick and choose very carefully.

I am concerned with the gathered waist and my thickening middle. I've said this before on the blog, I have three major fitting problems. They are a larger than average bust line, a thick waist and a short waist length. Only one I can do anything about physically, the thick waist is a constant battle that is proving more and more difficult as the years go on. The other flaws are just my body type. Normally, I wouldn't choose this type of pattern because it draws too much attention to my mid-section. Contruction grade: A-

And I was correct! Not the best look for me, but it's not a complete failure. (Yes, worse sewing disasters have been made in the recent past.) The light soft gingham saves the look by not be too puffy at the waist. I would wear this with an untucked blouse or sweater rather than the belt. Style and Wear Ability: C-

I'm going to have to think seriously about the styles in VoNBBS and pick and choose very carefully.
Saturday, June 21, 2014
Vogue 7375 - 1952 Construction

The skirt is very straight forward to put together. All the seams are straight stitching. It will be the finishing details that make the garment. The back seam, which has the zipper closure at the top, I have pressed open and have finished the edges with a Hong Kong finish. This first photo is the bias strip applied to one side of the seam.


Sunday, June 15, 2014
Vogue 7375 -1952 Pre-Construction Details.


Friday, May 30, 2014
Vogue 7375 - Cutting and Testing

Careful cutting and planning took a bit of thinking. It was all fairly straight forward with a 1 inch square plaid and 1/2 inch seams.

Thursday, May 29, 2014
Three Rectangles

Looking at the illustrations in VoNBBS gave me a good idea of the shape and dimensions of the original Vogue 7375 pattern. I decided to make the front panel 11 inches wide with a center front fold giving me a 22 inch wide cut. The length is finished skirt length plus 1/2 inch for the upper seam and 3 inches for the hem depth.
The two back panels are 33 inches wide. These three pieces will be sewn together to make the skirt body. The zipper will be applied to the center back seam. (I'm quite sure Betty Freidan and Maya Angelou would have a few choice words for me at seeing they had been reduced to pattern weights for the afternoon and perhaps my nightstand reading is bit too personnel for a sewing blog.)


Finally, I measured a waistband I liked for the width and used my waist measurement and added 1 inch for ease, 1 inch for end seams and 2 inches for overlap. Viola! Three rectangles.
Subscribe to:
Posts (Atom)
-
 Dear Readers, December has come, dark, rainy, wet, miserable December. A month better designated for hibernation than celebration....
 -
Now, it is nearly March. The winter was a tough one and it is not over yet. Weather and health were the two main foci. The snow and ice have...